Case
there are two resources that already provisioned on the azure subscriptions
Both of following resources are not tied to any virtual network (vnet) nor any subnet.
- Cosmosdb (CosmosDB)
- App Services Plan (ASP-ML)
Objective
Following main objectives should be accomplished.
- Assign the CosmosDB and ASP to same Vnet/Subnet.
To create a Vnet (virtual network, equivalent to AWS VPC) for CosmosDB and ASP and configuring the subnet so that both of the resources can interact within those private & isolated network.
- Create VPN(Virutal private network) based on those VNET/Subnet for the developer to access the databases (cosmosdb) using open VPN
Role Action Permission Needed
Use Owner account or any account with contributor role but with following access.
List of required permissions.
- Microsoft.Network/virtualNetworks/read - Read the virtual network definition
- Microsoft.Network/virtualNetworks/subnets/read - Read a virtual network subnet definition
- Microsoft.Network/virtualNetworks/subnets/- write Delegate the subnet.
- Microsoft.Network/virtualNetworks/subnets/join/action - Joins a virtual network
Network Creation
Creating Virtual Network
Virtual network or Vnet is a private networking concept on Azure Cloud which equivalent to the AWS VPC (Virtual private connection).
Subnet will reside inside the vnet. One vnet can have many subet.
 Create virtual network on azure
Go to the virtual network resources and create a new virtual network with following details
 Add ip address space for the vnet
Predefined Rule
- Ensure the CosmosDB and ASP are located within same region (on this case is southaeast asia).
- Create new RG for network component. Suggestion : [product-name]-vnet-[dev/sit/uat/prod]
- For now both of cosmosdb and ASP will be in same vnet. Ideally ASP will be on different vnet as the ASP will need outbound connection to internet.
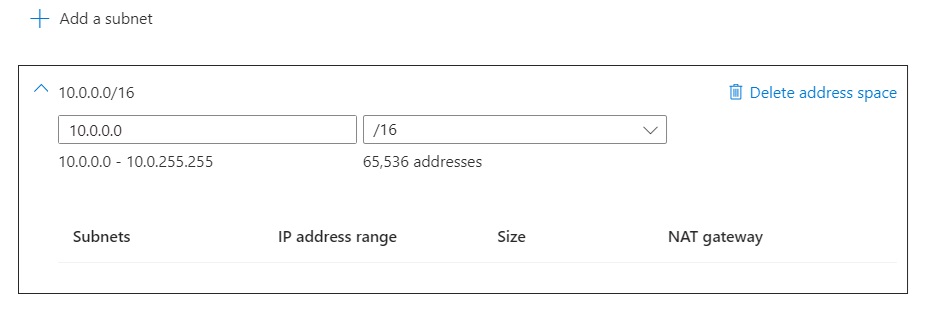
- address space 10.0.0.0/16 (10.0.0.0 - 10.0.255.255) total 65.533 address. Those addresses will be used for several vnet. Hence /16 is logical.
Final configuration of the VNET before the provisioning process.
 check vnet details before provisioning the resources/vnet
Create Subnet
 Create subnet on the virtual network that previously created.
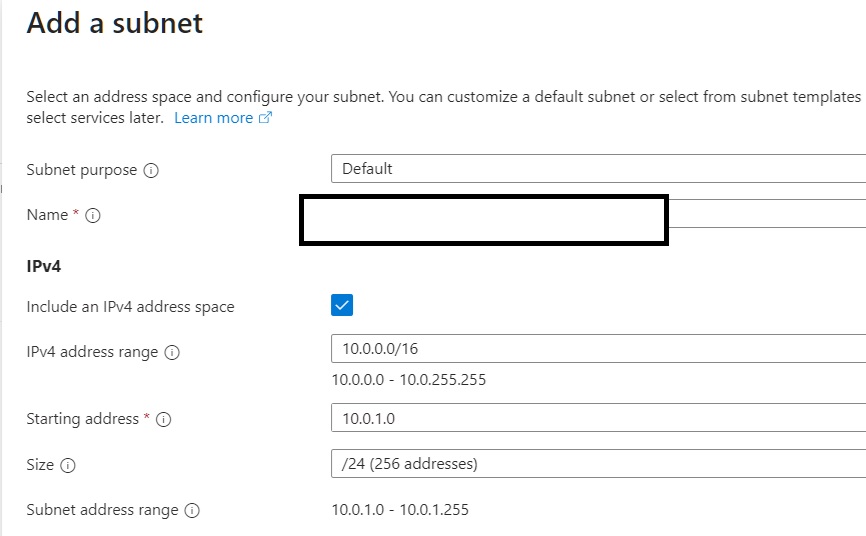
Create subnet (sub-network) on the 10.0.0.0/16 (the vnet created on previous steps) for the CosmosDB.
- subnet ip address/size : 10.0.1.0/24
- subnet ip range : 10.0.1.0 - 10.0.1.255
- purpose : default
- name : [product-name]-vnet-[dev/sit/uat/prod]+storage-subnet
Generating Self Signed Certificate (Root/Server)
Generate Root Certificate
New-SelfSignedCertificate -Type Custom -KeySpec Signature -Subject “CN=TestCert” -KeyExportPolicy Exportable -KeyLength 2048 -HashAlgorithm sha256 -CertStoreLocation “cert:\LocalMachine\My”
PS C:\Users\<user>\Documents\Solution Architect\SSL> New-SelfSignedCertificate -Type Custom -KeySpec Signature -Subject "CN=TestCert" -KeyExportPolicy Exportable -KeyLength 2048 -HashAlgorithm sha256 -CertStoreLocation "cert:\LocalMachine\My"


   PSParentPath: Microsoft.PowerShell.Security\Certificate::LocalMachine\My

Thumbprint                                Subject
----------                                -------
966CA23D3ABFE94D834DB3525484C9DBC77916F9  CN=TestCert
the certificate will be stored on windows certificate store.
Find root certificate
| $rootCert = Get-ChildItem -Path Cert:\LocalMachine\My | Where-Object { $_.Subject -match “CN=TestCert” } |
Export Root Certificate
Export-Certificate -Cert $rootCert -FilePath “C:\Users<user>\Documents\Solution Architect\SSL\MyVPNRootCert.cer”
Client Certificate
Generate Private Key
$cert = New-SelfSignedCertificate -Type Custom -Subject “CN=MyVPNClient” -KeySpec Signature -KeyExportPolicy Exportable -KeyLength 2048 -KeyAlgorithm RSA -HashAlgorithm SHA256 -CertStoreLocation “Cert:\CurrentUser\My”
Export Client Certificate
$certPath = “C:\Users<user>\Documents\Solution Architect\SSL\MyVPNClient.pfx” $certPassword = ConvertTo-SecureString -String “test1234” -Force -AsPlainText Export-PfxCertificate -Cert $cert -FilePath $certPath -Password $certPassword
Export to CER public file
$publicCertPath = "C:\Users\<user>\Documents\Solution Architect\SSL\MyVPNClientPublic.cer"
Export-Certificate -Cert $cert -FilePath $publicCertPath
Generate client in pem format
openssl pkcs12 -in client_cert.pfx -clcerts -nokeys -out client_cert.pem
Extract Client Private Key
openssl pkcs12 -in client_cert.pfx -nocerts -out client_key.pem
remove passphrase (optional but recommended)
openssl rsa -in client_key.pem -out client_key_no_passphrase.pem
update ovpn config
1.client_cert.pem => client certificate 2.client_key.pem => private key
done.