
The Aftermath of Heavy Storage Occupation
Lack of storage on the server can affect performance of the backend services especially if the storage occupancy almost hit the maximum allocated volume size. The performance degregadation typically happened at arround >= 95% occupancy especially at ubuntu server because by default the linux file system reserve and lock arround 5% for system use. So that the backend services or other daemon program can’t claim those storage.
Regular check ubuntu server storage occupancy need to be added as part of daily house keeping script especially when managing numerous of server. In order to check freespace on ubuntu server, “disk filesystem” command can be utilized. It has feature to check disk information from calculting free storage space until listing the available mounted storage.
Checking Storage Occupation On Ubuntu Server
Execute following command on the ubuntu server shell.
df -h
df means disk filesystem and “-h” cli parameter is telling the command to return human readable responses.
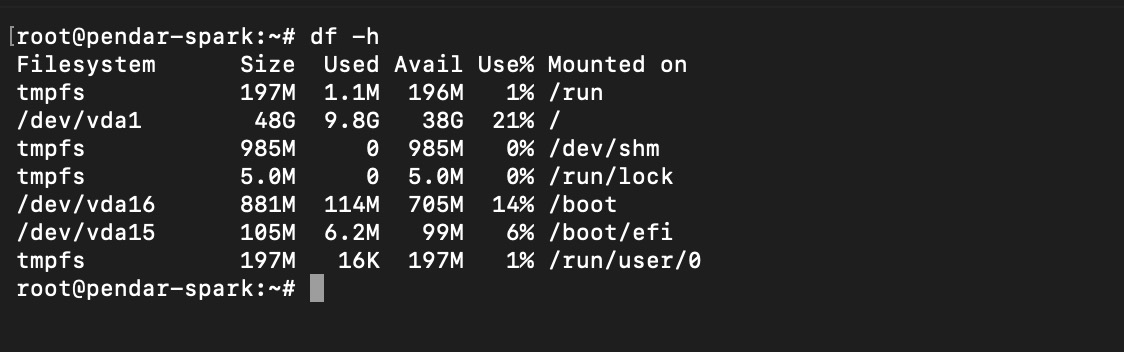 sample of df -h command result
root@pendar-spark:~# df -h
Filesystem      Size  Used Avail Use% Mounted on
tmpfs           197M  1.1M  196M   1% /run
/dev/vda1        48G  9.8G   38G  21% /
tmpfs           985M     0  985M   0% /dev/shm
tmpfs           5.0M     0  5.0M   0% /run/lock
/dev/vda16      881M  114M  705M  14% /boot
/dev/vda15      105M  6.2M   99M   6% /boot/efi
tmpfs           197M   16K  197M   1% /run/user/0
root@pendar-spark:~#
the responses indicate following information:
- There are seven mounted filesystem (can be partition or virtual drive) which is represented by each line of the table. The mounting path can be seen under “mounted on” column and the name of file system can be checked under “File system” column (the 1st column)
- size column is the total allocated volume of the file system
- used & use% column: number or percentage of occupied volume on the file system
- avail column: the remaining available space on specific file system
Before checking the filesystem occupancy information, its important to understand in which file system ubuntu server and the backend services are deployed because those two instance are the one that actvitely draining the storage spaces dailes due to logs or databases.
Now lets identify and analyze each file system.
| File System | Mounting | Usage |
|---|---|---|
| tmpfs | /run, /dev, /boot | temporary file system reserved by system RAM. if the tmpfs is mounted on “/boot” means its used to store linux kernel file for booting purposes. |
| /vda | /, /dev | vda means virtual disk partition. the main file system where the backend services, databases, OS lives on |
Therefore, keeping the “/vda” filesystem storage usage on all mounting point is the main priority. Ensure the occupancy is less than 80%. Alert can be placed before eaching the threshold. The devops engineering should get notification and take immediate action or it can also trigger housekeeping script to archive the logs/unused files (beware and be cautious, misdeletion can break the entire system).
On our cases, all /vda file system storage occupancy are less than 80%. No action need to be taken at this point.
Archiving and Compress Folder
Go to the folder path that store the target folder. For example:
/root/crawler/milestoneku-crawler
here is the target folder that will be archived
 s_output folder will be archived
execute following command
tar -czvf s-output.tar.gz ./s_output
above command will create a compressed file in tar format that consisted of all file inside the target folder.
wait until the archive process is completed. Be cautious when archiving folder that has large files. it could eat up the server memories and might affect the running services. It is recommended to only archive big files during low traffic time.
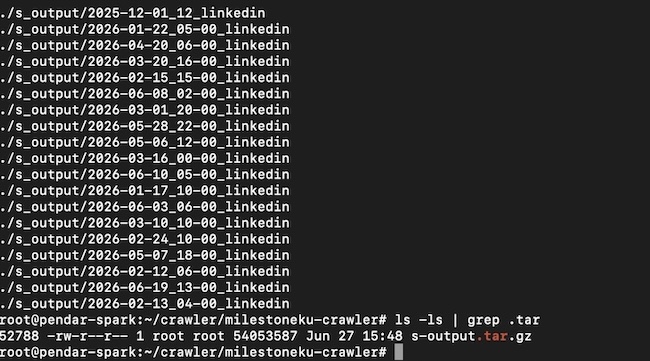 archiving of s_output folder is succeed
Download The Archived Folder Into Local Computer
There are several method to download the archived file from server to the local computer. If its one time setup, ssh can be used to download the archived file otherwise FTP server might need to be configured and exposed.
below is the steps to download archived file from server to local computer using SCP (secure copy protocol)
find the archived file (on this case is s_output.tar.gz) full path
/root/crawler/milestoneku-crawler/s-output.tar.gz
then execute following command to download it using SCP into local computer.
scp ssh_username@server_ip:/root/crawler/milestoneku-crawler/s-output.tar.gz .
note:
- replace the server_ip with the server public ip or private ip (incase connected using VPN)
- replace “.” with the target local folder. use dot “.” to download into the active directory of the terminal
- replace “ssh_username” with the actual username.
wait until the download process is completed.
 the file has been successfully downloaded to local machine using SCP