
FastAPI based Backend Services using Conda
Below are the steps to initiate fastAPI project using conda
Conda Project Setup
create new python project using conda to manage multiple python project with different python server easily. Execute following command
conda create --name=[project_name] python=[python-version]
it will take sometimes as conda need to install and setup new python binary for that specific environment.
If the python project is successfully created it will print out following message on the terminal console
Preparing transaction: done
Verifying transaction: done
Executing transaction: - done
# To activate this environment, use
# $ conda activate backend-api
# To deactivate an active environment, use
# $ conda deactivate
or if the default location of conda project need to be adjusted, following command can be executed
conda create -p ./env python=3.12 -y
it will create conda project on the active directory.
activate the environment
conda activate [environment_name]
note: conda project be removed using following command
conda remove --name [conda_project_name] --all
validate if the terminal already pointed to correct conda’s python binary by executing following command
which python
which pip
both binaries (python and pip) should be pointed to the conda’s environment path as shown below
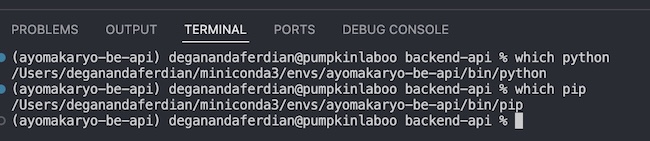 both python path & pip path are pointed to correct specific conda binary file
next up is setting up the git
execute following command to initialize git
git init
not all files need to be added on the repository. Conda environment file like the python binary are not neccesary to be pushed to the repostiory.
below are the folder list from conda environment which need to be excluded as its not the main backend services source code
- env (including the sub folders)
- DS_Store (if you’re on mac)
create new file called as .gitignore
touch .gitignore
add paste following content to the file
env
Install fastAPI on Conda
If visual studio code (VSC) is used, dont forget to change the python interpreter as well.
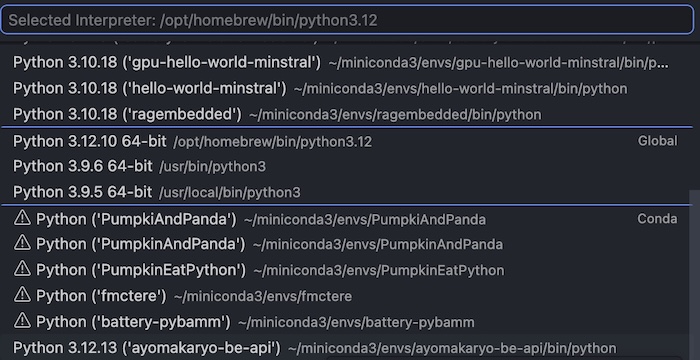 select correct conda python interpreter on the VSC IDE
Install fastAPI using PIP by executing following command
pip install "fastapi[standard]"
note: fastAPI doesnt rely on C++ library. Hence, installing through PIP is sufficient. Choose whether PIP or conda is used as mixing both of package manager can break the dependencies.
validate if fast API has been installed properly. Execute following command
pip list. | grep "fastapi"
It should be listed under the python package list.
 fast api is successfully installed on the pip
Hello World API Endpoint
create a new directory called as “src”
mkdir src
create a new file called main.py and paste following code
from fastapi import FastAPI

app = FastAPI()

@app.get("/")
async def root():
    return {"message": "Hello World"}
clear cache on the terminal
hash -r
rehash
ensure the fastapi binary is pointed to correct conda environment
compile run the fastAPI using following command
fastapi dev
fastapi has been succesfully installed within conda environment
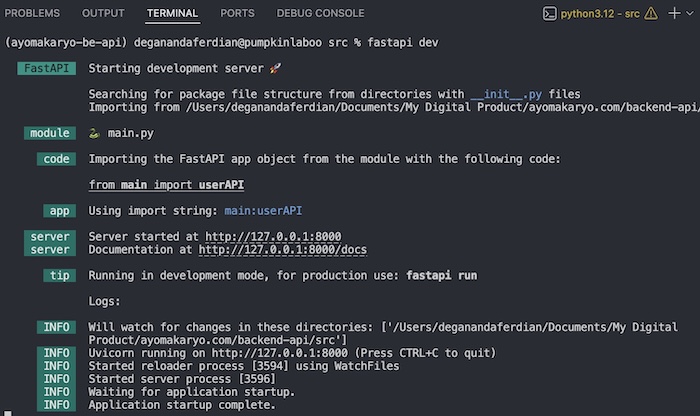
open browser and access localhost with port 8000 with following endpoint /helloworld
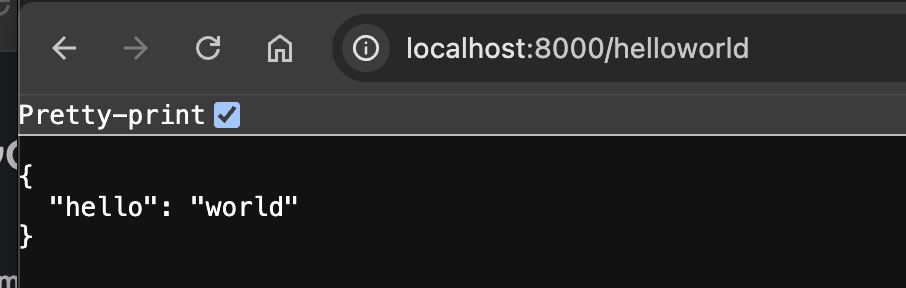 Accessing fastAPI endpoint on browser
done.