Cloudflare for Static Websites and SPA
Cloudflare is one of the famous CDN (content delivery network) services provider due to the intensive server distribution all over the world.
Static websites such as jekyll, hugo or NextJS (configured for static site) and SPA (single page application) can get benefical capability of cloudflare CDN unlike non static website that require server side rendering as cloudflare does not provide server side hosting like php, ruby, GO, rust and so on,
Static and SPA website can be deployed directly to the cloludflare and enjoy massive content delivery network.
Cloudflare offer generous free tier pricing to host static website through workers & pages services with up to 100K request per day.
Ensuring the site is accessed through lowest latency possible as user/client will be served from their nearest possible server location.
There are two options for deploying jekyll based website on cloudflare infrastructure
- via Cloudflare workers
- via Cloudflare pages
Cloudflare pages is the most recommended approach to host jekyll as cloudflare pages is built for host static files or websites including jekyll.
However, cloudflare workers can also be used to deploy jekyll using some additional configuration using wrangler library.
Cloudflare Workers vs Pages Comparison to Host Jekyll Static Sites
below are the comparison between cloudflare workers and cloudflare pages to host jekyll static files.
| Factor | Cloudflare Pages | Cloudflare Workers |
|---|---|---|
| Deployment Approach | Straightforward direct upload the site folder |
Require wrangler to let the worker to host specific target directory |
| Configuration file needed | none | wrangler.toml |
| Best for | host static files/websites | host serverless javascript backend services |
| Advantages | Better CDN performance, native integration with jekyll framework | additional capability such as : authentication, rewrite url, read & write to cloudflare databases such as D1, KV, <br/ > and perform SSR (server side rendering) |
Steps to Deploy Jekyll on Cloudflare Workers.
Below are the project and deployment stack for this article
| No | Category | Stack Name |
|---|---|---|
| 1 | Static Web App Framework | Jekyll |
| 2 | CDN & Storage | Cloudflare worker & pages |
there are primarely three steps to deploy jekyll bsaed application to cloudflare worker and pages.
Create Application on Cloudflare Workers
Navigate to the cloudflare dahsboard and click the create application button that located on the top right of the web pages.
Choose “connect to github” options to allow cloudflare pages fetch the latest code from the github repository
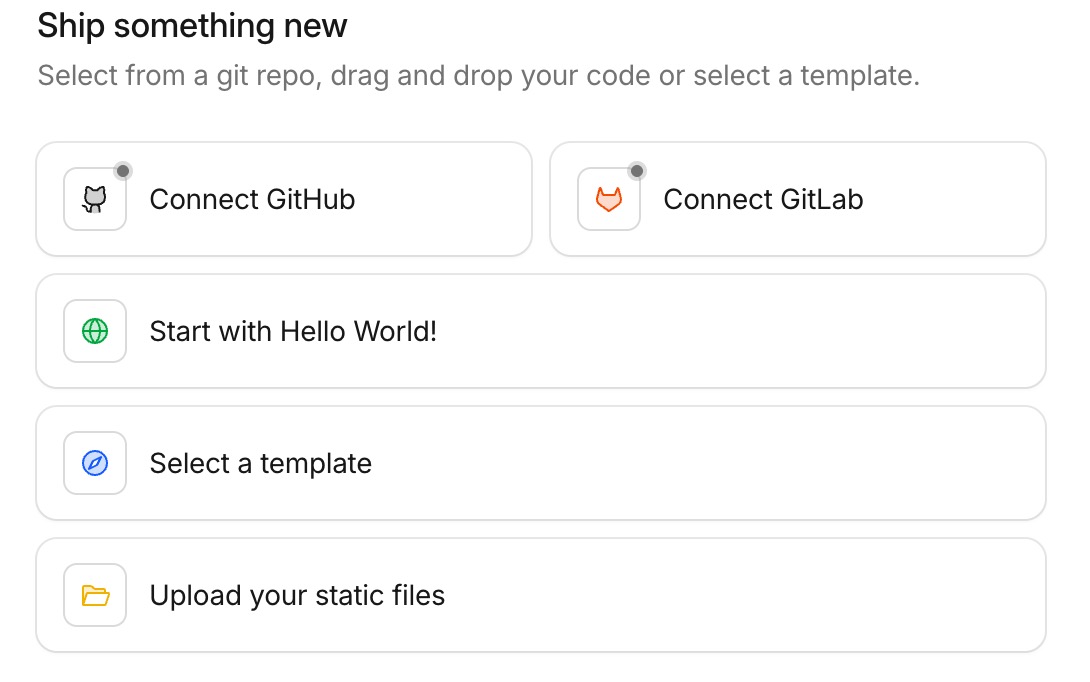 choose connect to github in order to integrate your github repository.
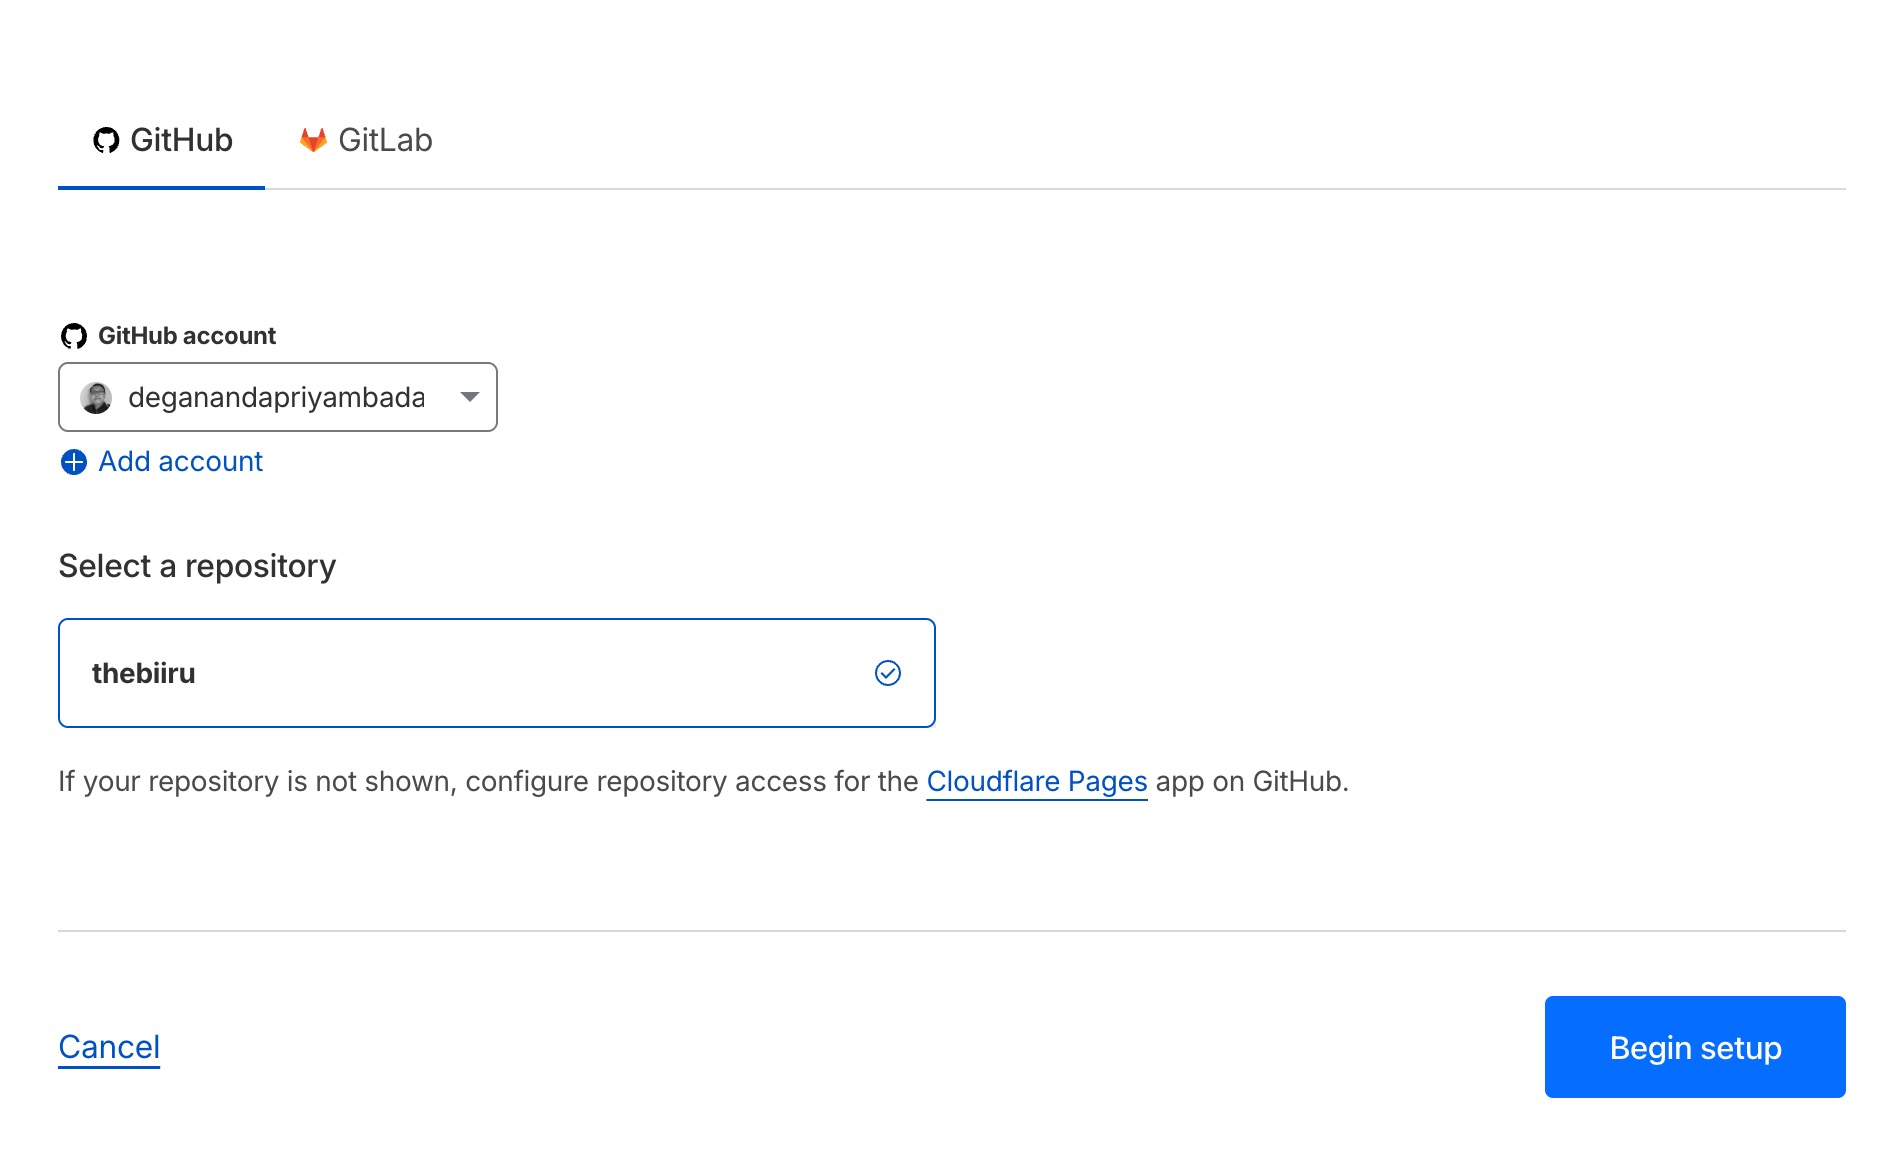
Select Github Account
If your browser is authenticated to the github and it use same email with your cloudflares account, then cloudflare will automatically detect the connected github account.
Choose the github account that store the project source code.
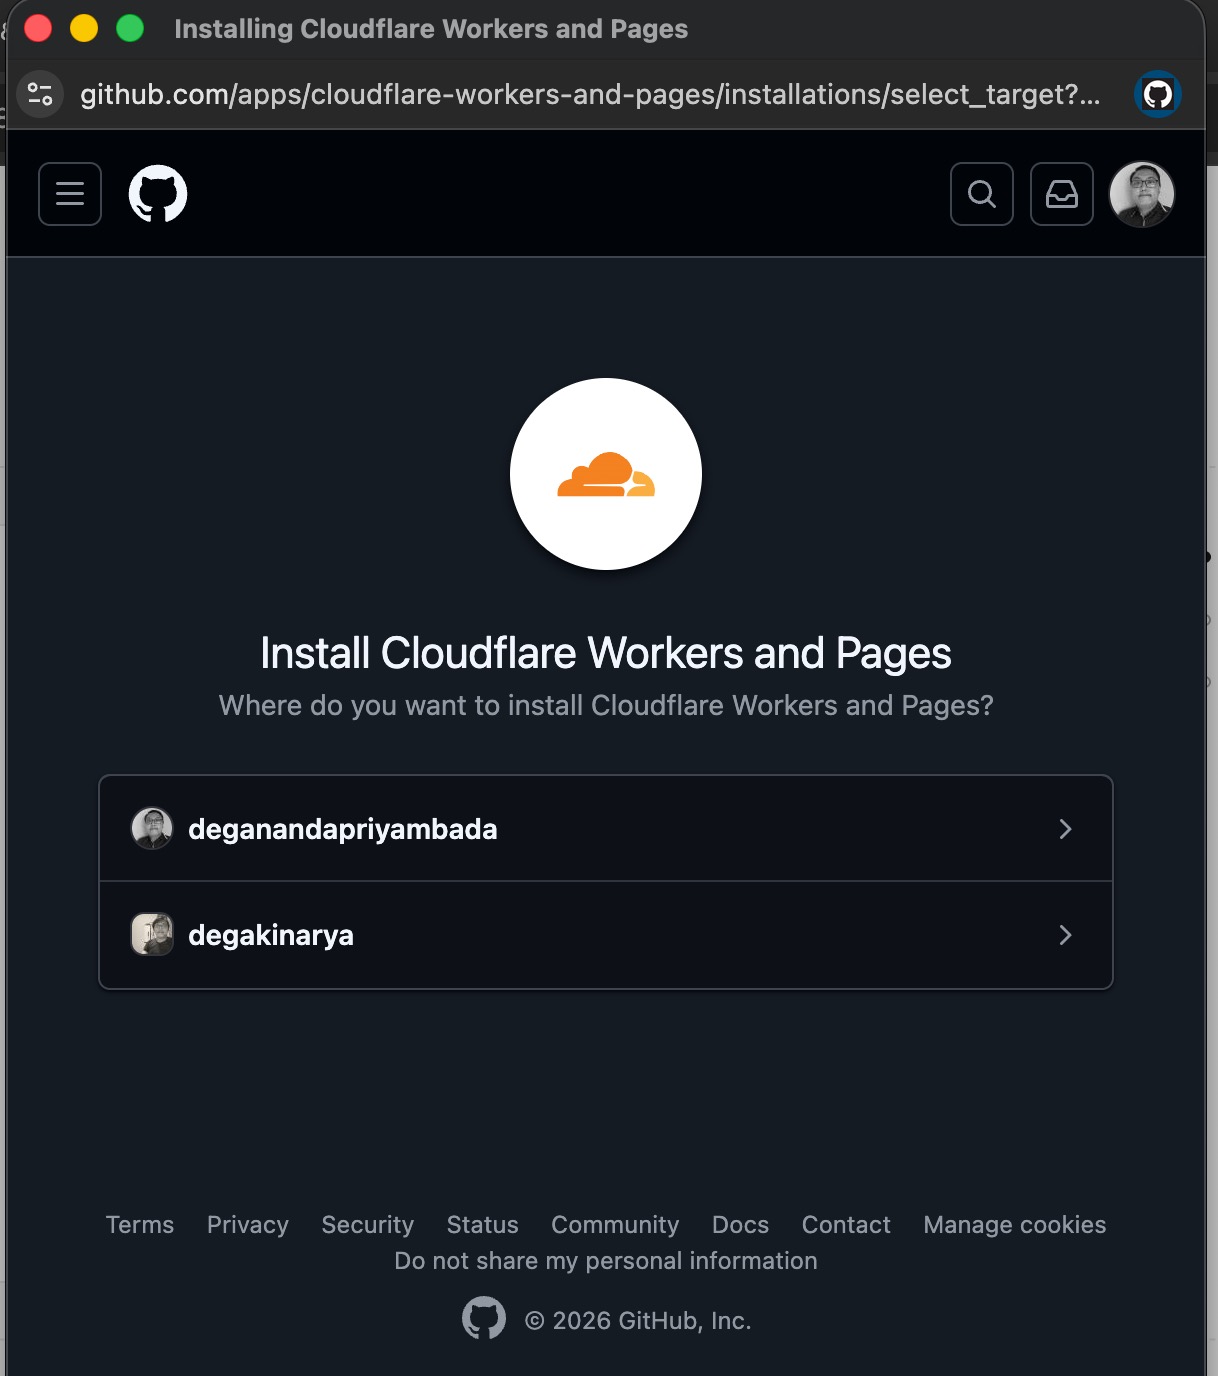
It is recommended to only allow cloudflare access selected repository that hold the project code.
Do not grant cloudflare all access to the repository for security purposes.
wait until the porcess is finished.
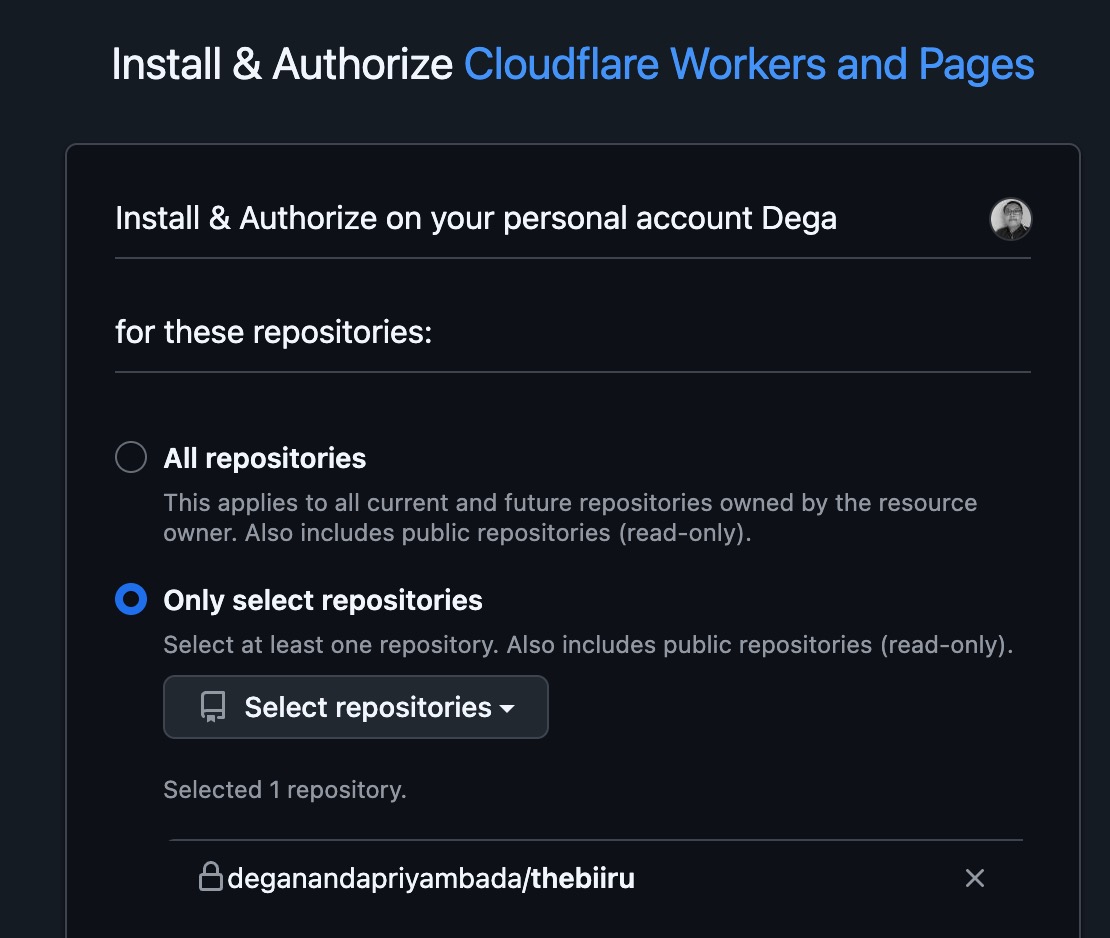 allow only specific repository otherwise cloudflare can access all your repository.
Add repository to the cloudflare
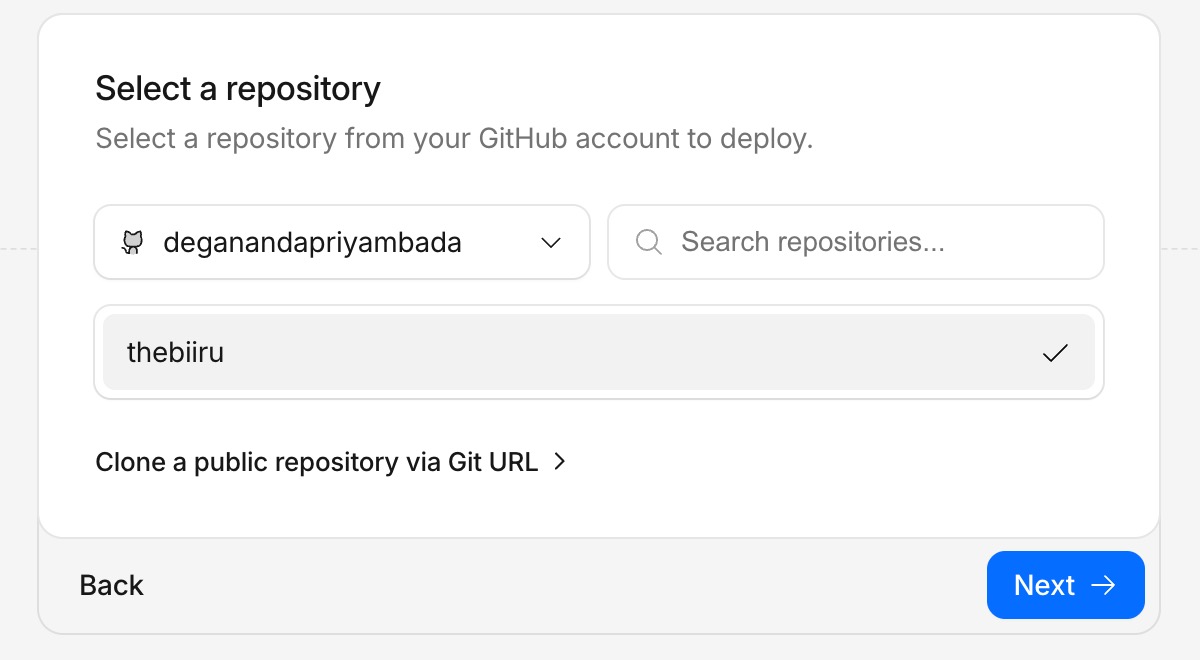
Click again the continue to github, now cloudflare will display the selected repostiory that ready to be integrated into cloudflare.
tick or click on the repository name until “check” icon is appeared on the right side of the repository name.
 Checkmarks icon indicating cloudflare is successfully connected to the github.
Click next to proceed deploying the jekyll project.
Setup the deployment command
below is the build command
bundle install && bundle exec jekyll build
Bundle install command will install all neccesary ruby package dependencies that are stated on the Gemfile and Gemfile.loc, then it will be chained with jekyll build command to compile all the jekyll liquid syntax and ruby files and store it into _site folder (jekyll output/dist folder)
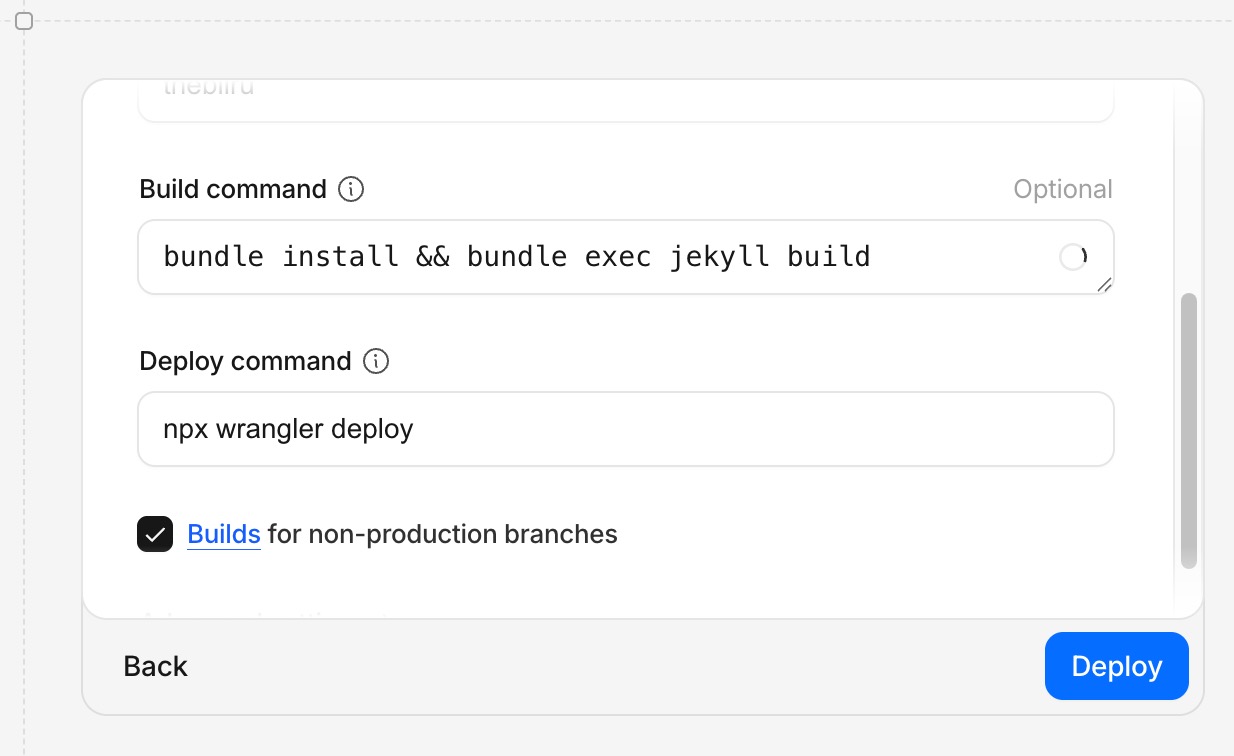 Deployment command if using wrangler for github worker.
and below is the deploy command
npx wrangler deploy
non production deploy command
npx wrangler deploy
note: wrangler.toml is required to be present at the root directory of the repository.
add following wrangler.toml
name = "thebiiru"
compatibility_date = "2026-02-28"

[assets]
directory = "./_site/"
Start the deployment
Click deploy and wait until the deployment progress is completed.
 wait deployment process on cloudflare worker is completed.
We specific bundle install, it means that the project is written using ruby. Hence, cloudflare page will install all the neccesary runtime or library dependency first.
16:16:01.897	Deployed thebiiru triggers (1.68 sec)
16:16:01.897	  https://thebiiru.deganandaferdian.workers.dev
16:16:01.897	Current Version ID: a51ab627-0c3c-415c-9070-a133bb12ec0a
16:16:01.899
16:16:01.899	Cloudflare collects anonymous telemetry about your usage of Wrangler. Learn more at https://github.com/cloudflare/workers-sdk/tree/main/packages/wrangler/telemetry.md
16:16:02.053	Success: Deploy command completed
16:16:02.173	✨ Success! Build completed.
deployment logs will print out deployment status. If the deployment is successfull, the success message will be available on the logs.
Enable the domains and routes
Even the deployment is successfull, the jekyll site can’t be access yet as there is one more steps to be done which is to define the domain and routes.
go to the dashboard of your apps and click on domains and routes menu
enable workers.dev domain by right clicking on the three horizontal dots and choose “enable domain”
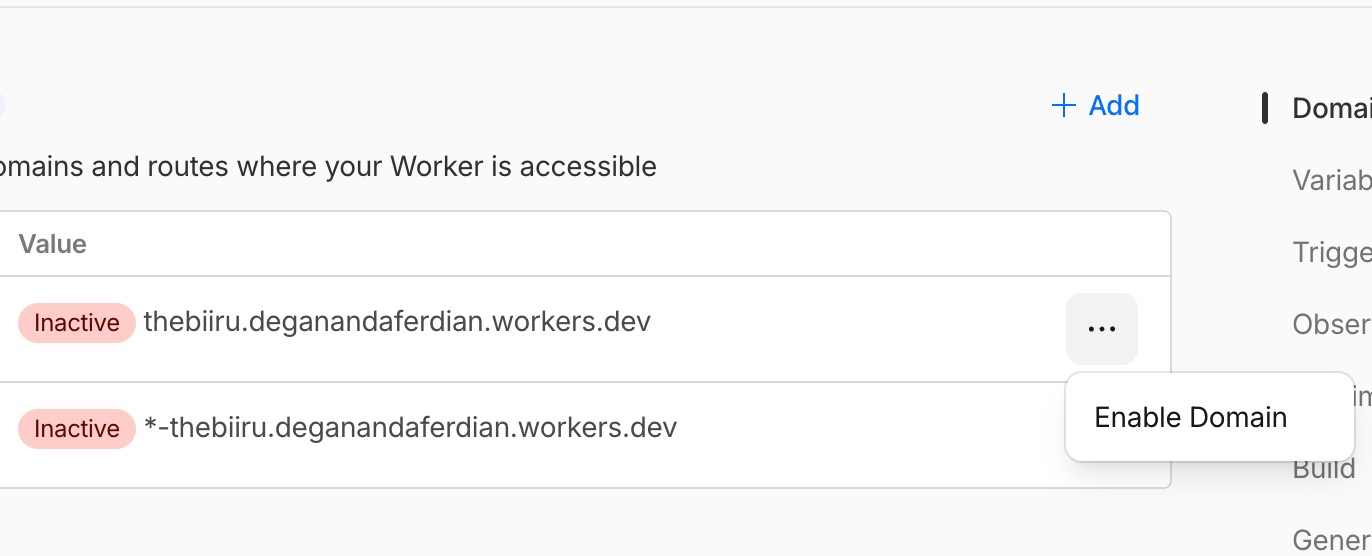 Enable domain routing to make the website is accessible from public.
note: cloudflare is providing free subdomain at no cost from the workers.dev main domain. However, custom domain registration is also available to be bough from cloudflare domain registration (they also include free SSL).
Preview domain can be enabled if you wanted to have specific domain for each of your apps version. Generally, preview domain is not required.
Access Jekyll site through browser.
Open following url on browser
thebiiru.deganandaferdian.workers.dev
Now its done.
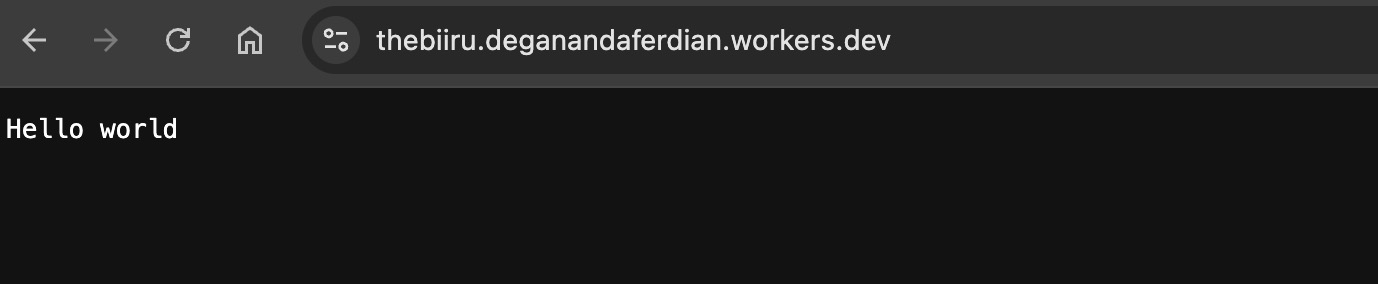 Our website now is successfully hosted on top of cloudflare workers.
Alternative Jekyll Deployment Options using CloudFlare Page
Apart from deployment through cloudflare workesrs, jekyll project can also be deployed via cloudflare pages which is more recommended than cloudflare worker because worker is by default to host serverless backend services.
Workers is mainly used for serverless javascript (nodeJS based) services, while pages is intended to deploy static web sites.
However, cloudflare workers can still be used to deploy jekyll based project with some additional configuration on the wrangler side. Wrangler is cloudflare specific runtime to manage cloudflare workers.
Deploy Jekyll Through Cloudflare Pages
Unlike cloudflare workers that require to configure and add wrangler.toml on the repository, Cloudflare pages can directly upload the compiled jekyll project outputs also known as _site folder by specifying the target build output directory.
below are straightforward steps to use cloudflare pages to deploy jekyll project through github integration.
import an existing git repository & select the repository
 Choose the jekyll repository location.
choose following configuration:
- framework preset: jekyll
- build command: jekyll build
- build output directory: _site
note: if your project has different output directory kindly adjust the value.
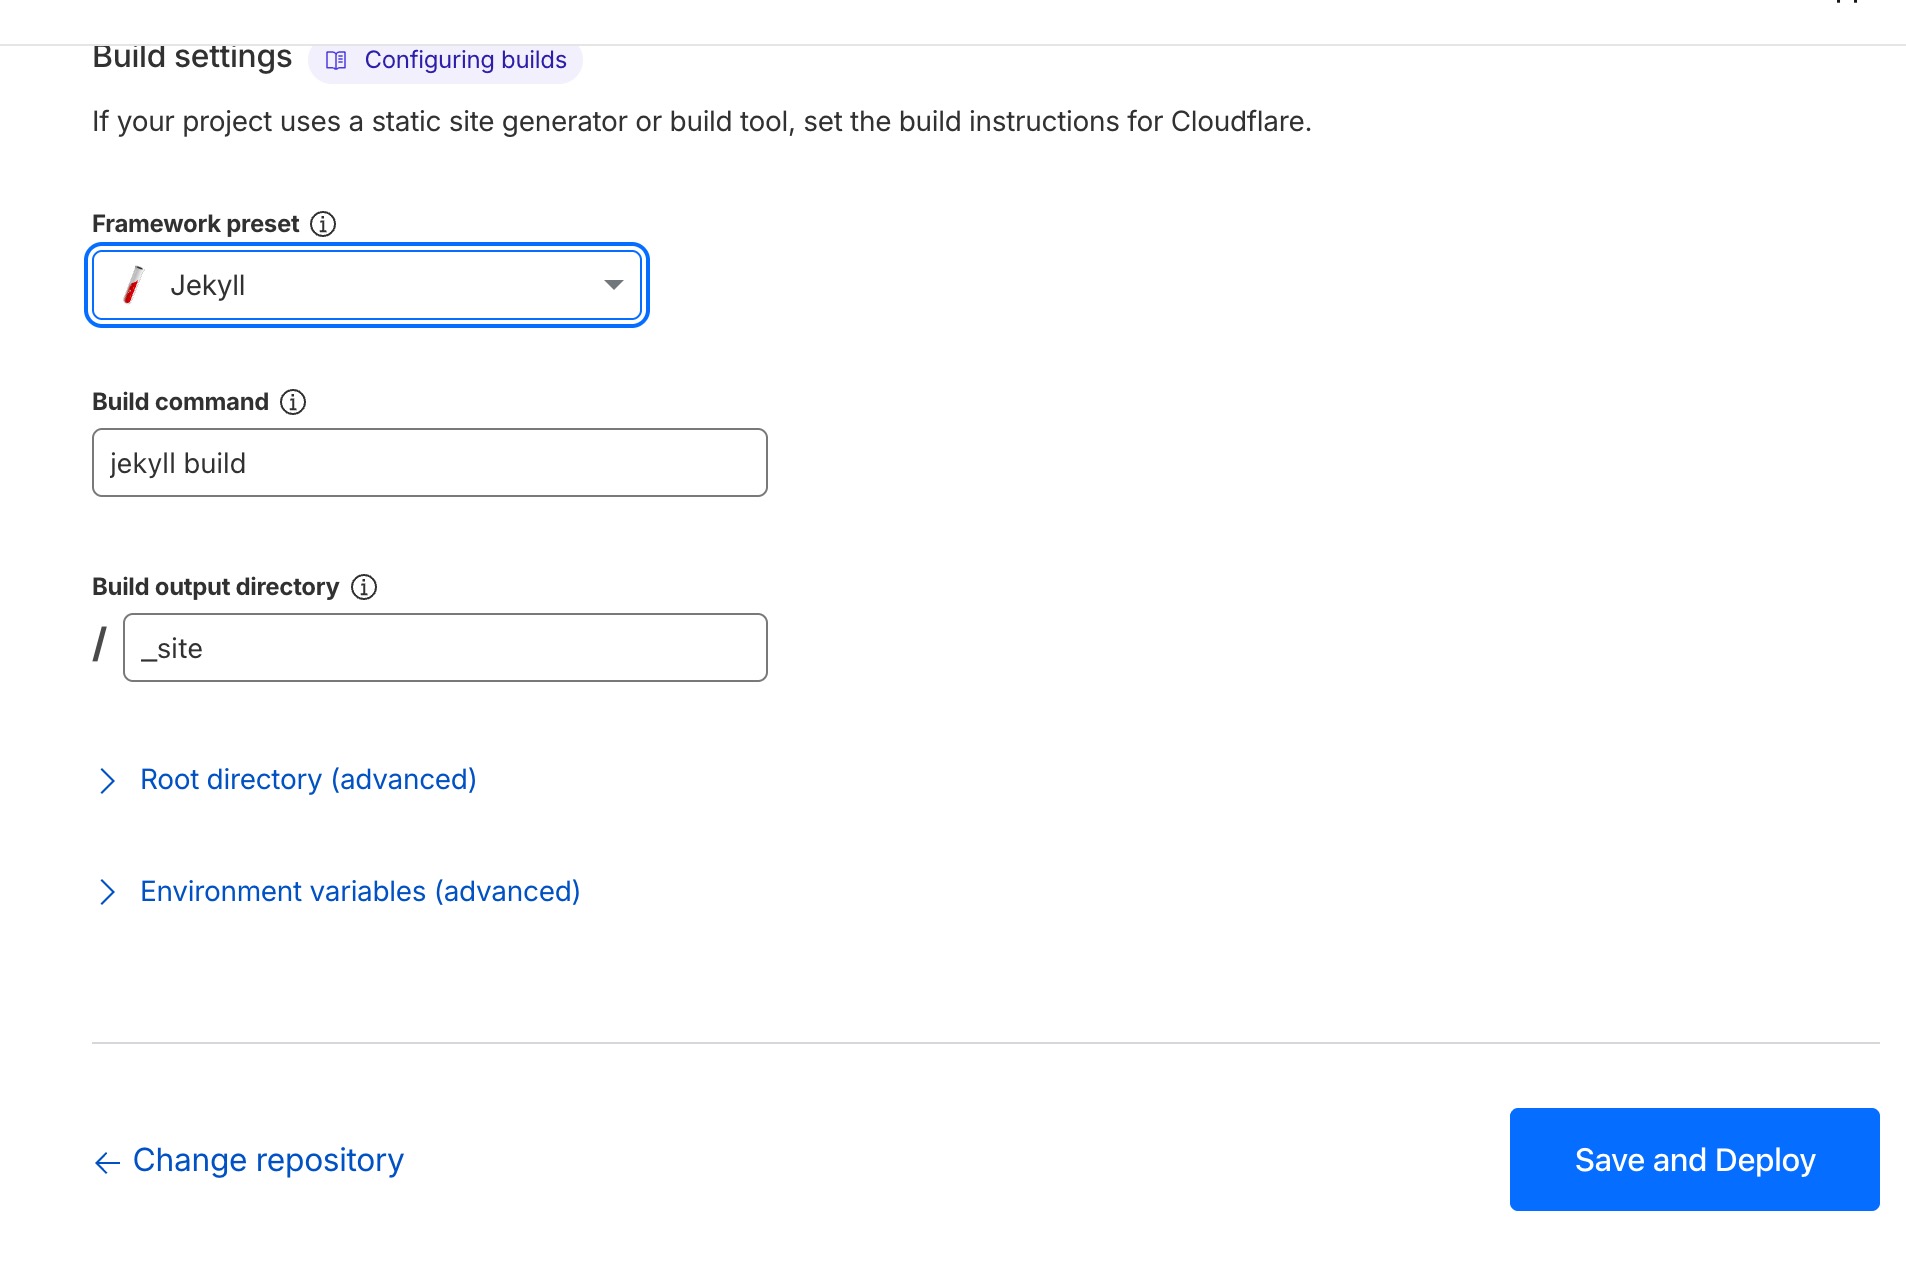 Input correct cloudflare pages configuration for jekyll and deploy it.
click save & deploy
wait until deployment is completed.
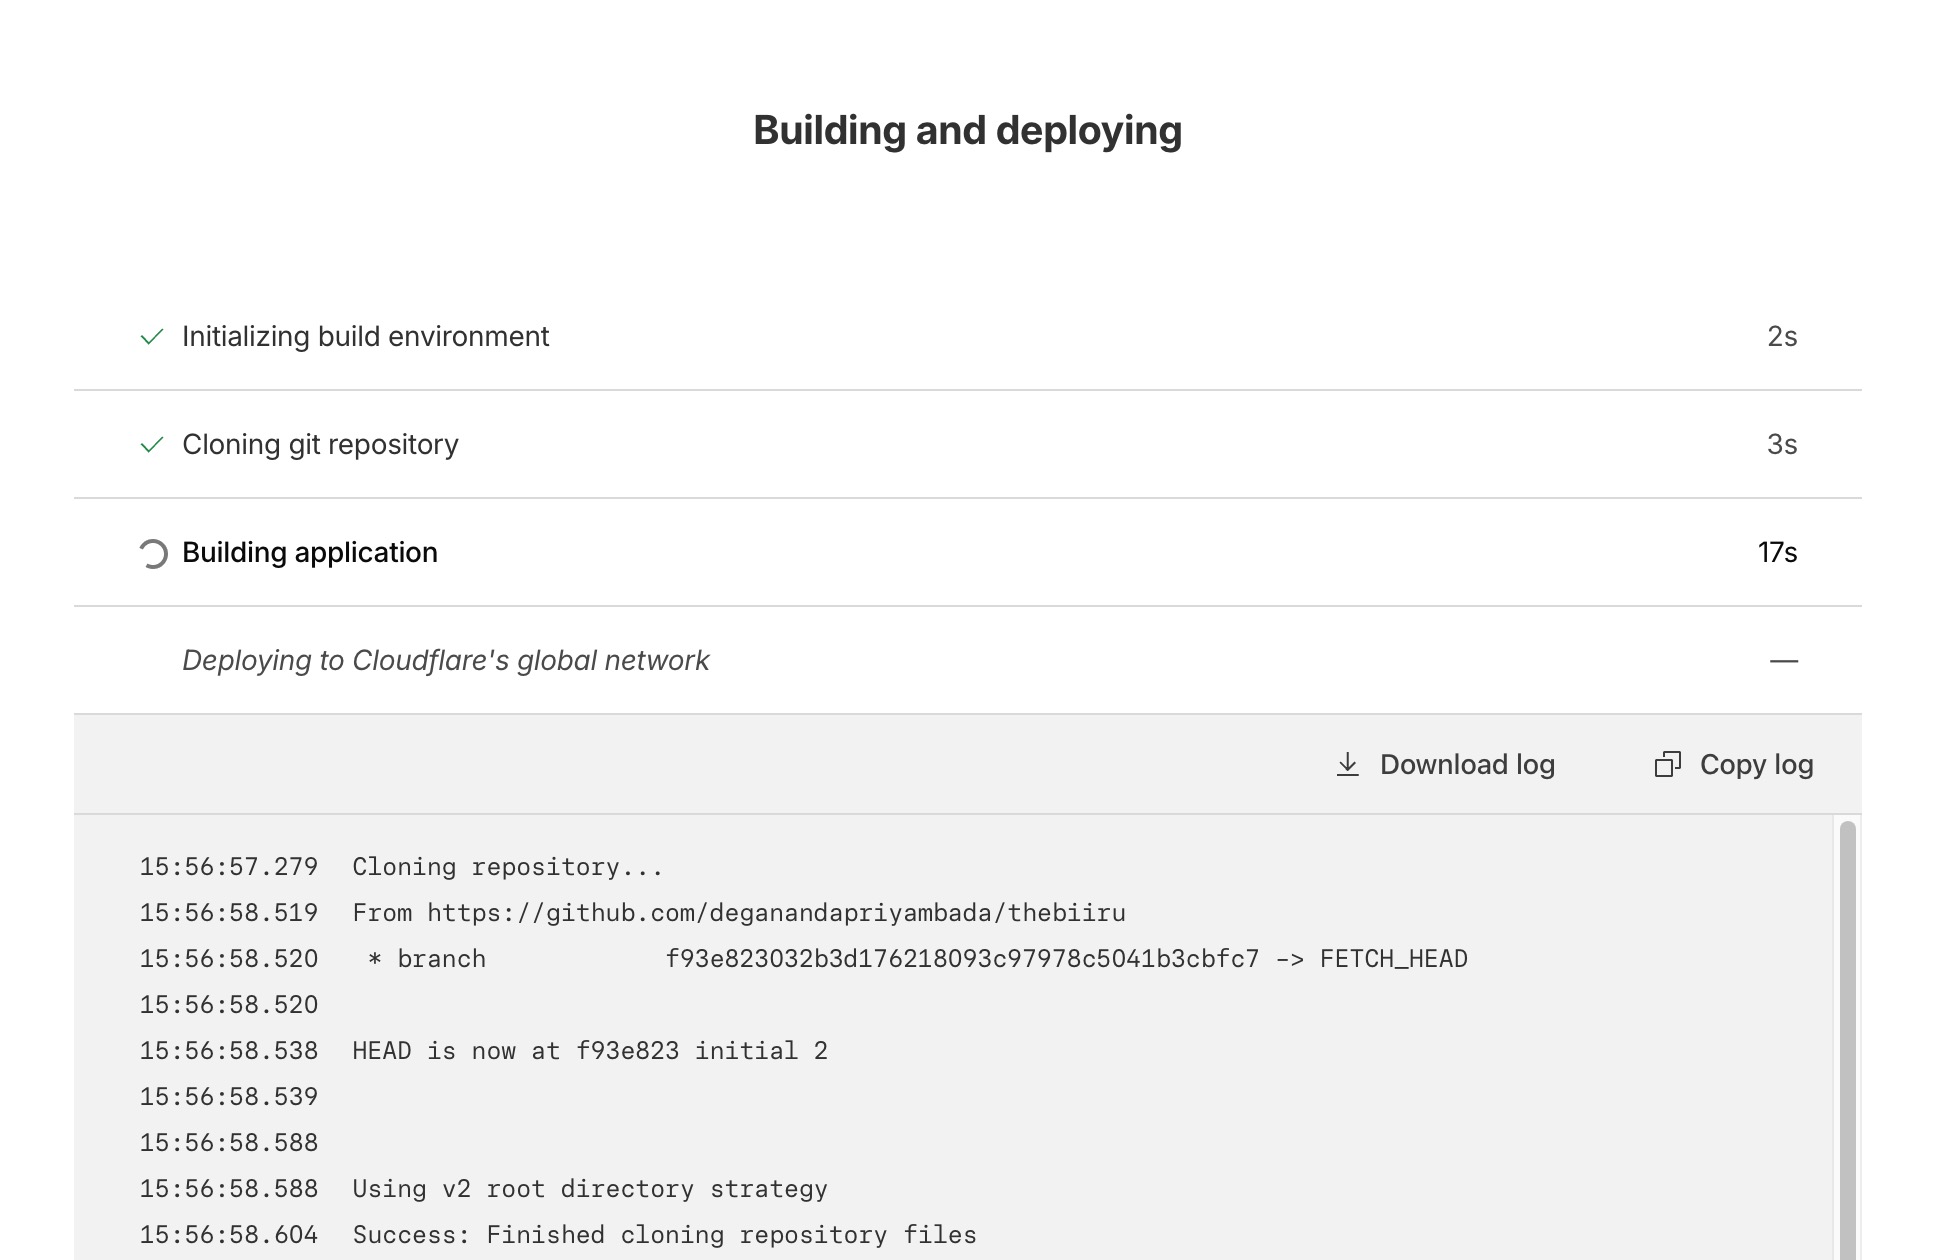 wait the deployment process of cloudframe pages from github repository is completed.
once the deployment is success click continue to project
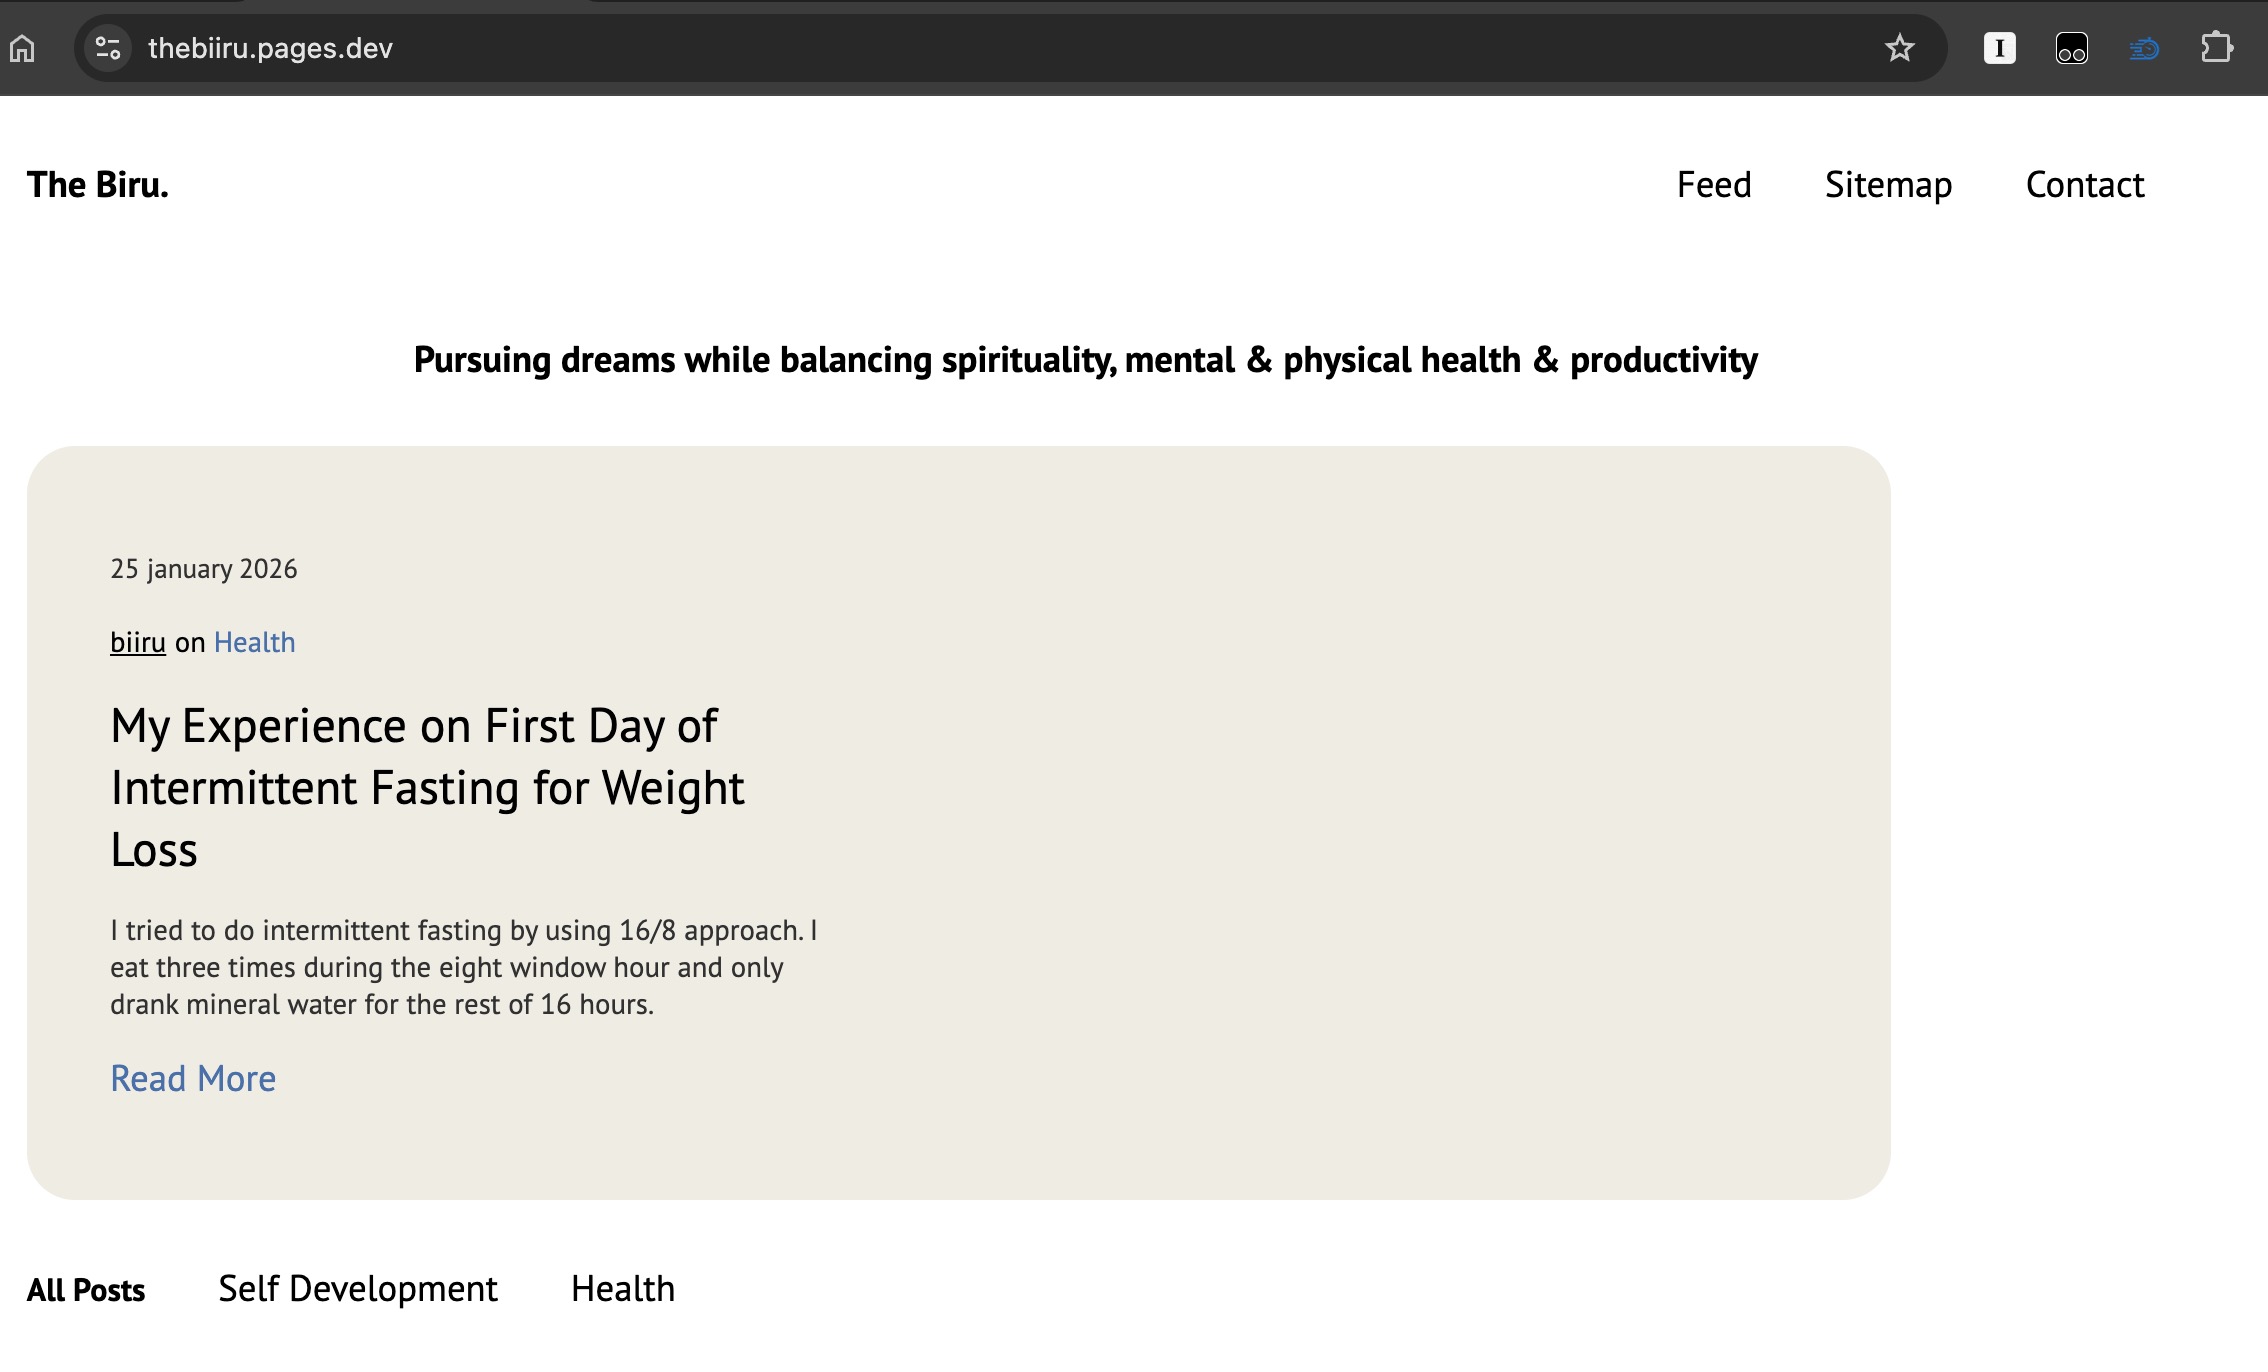 Jekyll based now accessible from the browser as its successfully deployed.
now access it:
thebiiru.pages.dev
and its done